Saturday, April 17, 2010

One Man's Trash


Welcome to my new Feature, called "One Man's Trash." Every Monday I'm going to do a post on Thrift Store, Yard Sale, or even "Dumpster Diving" finds! Most Posts will be showing a way to refurbish the item. But sometimes they'll be perfect on their own. LIKE.......

This amazing find I found at the D.I. (a thrift store here in UT). Vintage (I'm guessing, 1970's) Canister!
So amazing! Who would give these away? And I got the whole set for $5! Say what?!
They're all metal with that great avocado green color and I LOVE the style of the words!

When you find "Finds" like this, they can be used in unconventional ways. I will probably be using these in my office to hold my paint brushes, markers and such. I'm a little concerned about the metal being used with to hold edible items. But If want to later put them in my kitchen for decor, I will!


Friday, April 16, 2010

Dish Towel Curtains

This a projectt I don't think I ever posted, but these are also cafe curtains I made for the kitchen in my old house. This is the simplest way!
I found these dish towels and feel in love with them and the fabric was a perfect light linen.


Love the little birdie silhouettes!

Cafe Curtains!

This is a one day project or a two afternoon project. Really easy and fast (if you can sew )BEFORE
My windows in the kitchen needed some dressing up! So I thought I'd make some simple cafe curtains.
AFTER
What do you think? Better? I chose a material that had a little of all the colors I have going on in the kitchen.
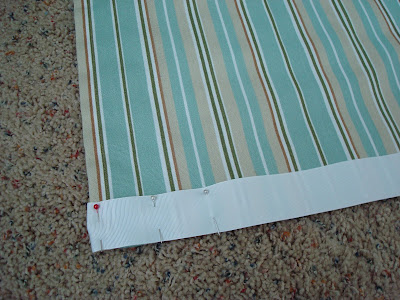
So I measured the windows and the material, but added an 2" extra on each side. 1" for the hem and an extra inch for some "slack" so they'd hang nice.
A trick my mom taught me to cut a straight line is fold the material over as you cut and follow that line. A side note, when I was little my mom would make me sew a project every summer. I hated it then, but I'm glad I learned. Thanks mom for teaching me your mad sewing skills!

A little pining and little sewing...

I added some ribbon on the bottom as a bit of a finishing touch.
The end! Well, I did have to hang the rods and then clip curtains on, you can find both at any Home Section at you local store.


Friday, April 9, 2010

Picture Blocks

I took a little three day break from blogging to come down off my Easter sugar high and harness that energy into painting my bedroom (pics to come!). My post is not a project I did recently, but I did promise to post it.
These picture blocks are so simple and I love the dimension it gives the photo.


So at you local home improvement store find a 2x5 unfinished piece of wood and have an employee cut it into 5" pieces, about 9.cents a cut. I think the first 2 are free. I don't have a pic of the raw wood because I did this when we moved and my camera was somewhere between lost and packed.

Next paint it black or brown, depending on your style. and sand the edges.

This is a handy little laminating/sticker machine from any craft store. It's about $32 dollars and if you use a 50% off coupon at Roberts Craft, cha ching!
Basically you feed your 5x5 photo through the machine and it puts adhesive on the back turning it into a sticker!
Lastly, if you want to hang it on your wall, nail a little bracket onto the back.
So cute!

The photos were taken by Sweet Apple Photography, but I think now she is The Enchanted Photo. We went the Sanpete County Fair and by some shear form of luck, had the place all to ourselves!

Monday, April 5, 2010

Easter Candy Left Overs!

Hope you had a great Easter! Did you eat all that Easter candy or are there still piles laying around you home?
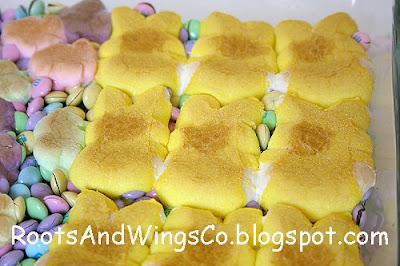
This idea for making Smore's with your Easter candy, comes from the blog rootsandwingsco. It would make a fun after school treat or a dessert for dinner!
Mmmmm! Looks good!


Friday, April 2, 2010

Plant a Delicious Surprise for Easter Dinner Dessert!

I've been waiting forever for the right opportunity to do this post. I love, love, love this!


A Dessert it a Pot!
  • Ingredients

  • 1/3 cup vegetable oil, plus more for pots
  • 3/4 cup unsweetened cocoa powder, plus more for dusting
  • 1 1/2 cups all-purpose flour
  • 1 1/2 cups sugar
  • 1 1/2 teaspoons baking soda
  • 3/4 teaspoon baking powder
  • 3/4 teaspoon salt
  • 1 large egg plus 1 large egg yolk
  • 3/4 cup buttermilk
  • 3/4 teaspoon pure vanilla extract
  • Quick Chocolate Frosting
Click above for a frosting recipe or one of your favorite.

Directions

  1. Preheat oven to 350 degrees. Brush the inside of each flowerpot with oil, and line with parchment paper or foil. Brush lining with oil, and lightly dust with cocoa.

  1. Sift cocoa, flour, sugar, baking soda and powder, and salt into the bowl of an electric mixer fitted with the paddle attachment. Add egg and yolk, 3/4 cup warm water, buttermilk, oil, and vanilla; mix on low speed until smooth, about 3 minutes.
  2. Divide batter among prepared pots, filling each about two-thirds full. Transfer to a rimmed baking sheet. Bake, rotating sheet about halfway through, until a cake tester inserted into centers comes out clean, 20 to 30 minutes. Let cakes cool completely on sheet on a wire rack.
Frost cakes with an offset spatula; sprinkle with crushed cookies. Top with candies; "plant" 1 mint sprig in each cake.

Thursday, April 1, 2010

Easter Morning for the kids!


I love this idea! Ii comes from my friend Jane's blog, check it out HERE !

At Easter she gives her kids Magic Jelly Beans, they plant them in the front yard and every year they grow something fun.

In the morning they get to go outside to fun surprise.
This year she found these at Walgreens for $1!! (she can fill you in on the details)
This is another little fun project for the kids. They could help you make and you could leave them out for the Easter Bunny, kind of like Cookies for Santa. Or you could make them and have the Easter Bunny leave them for the kids.
TO MAKE: Buy piping bags from the bakery at a grocery store and the fill with Orange goodies and tie with a green ribbon.